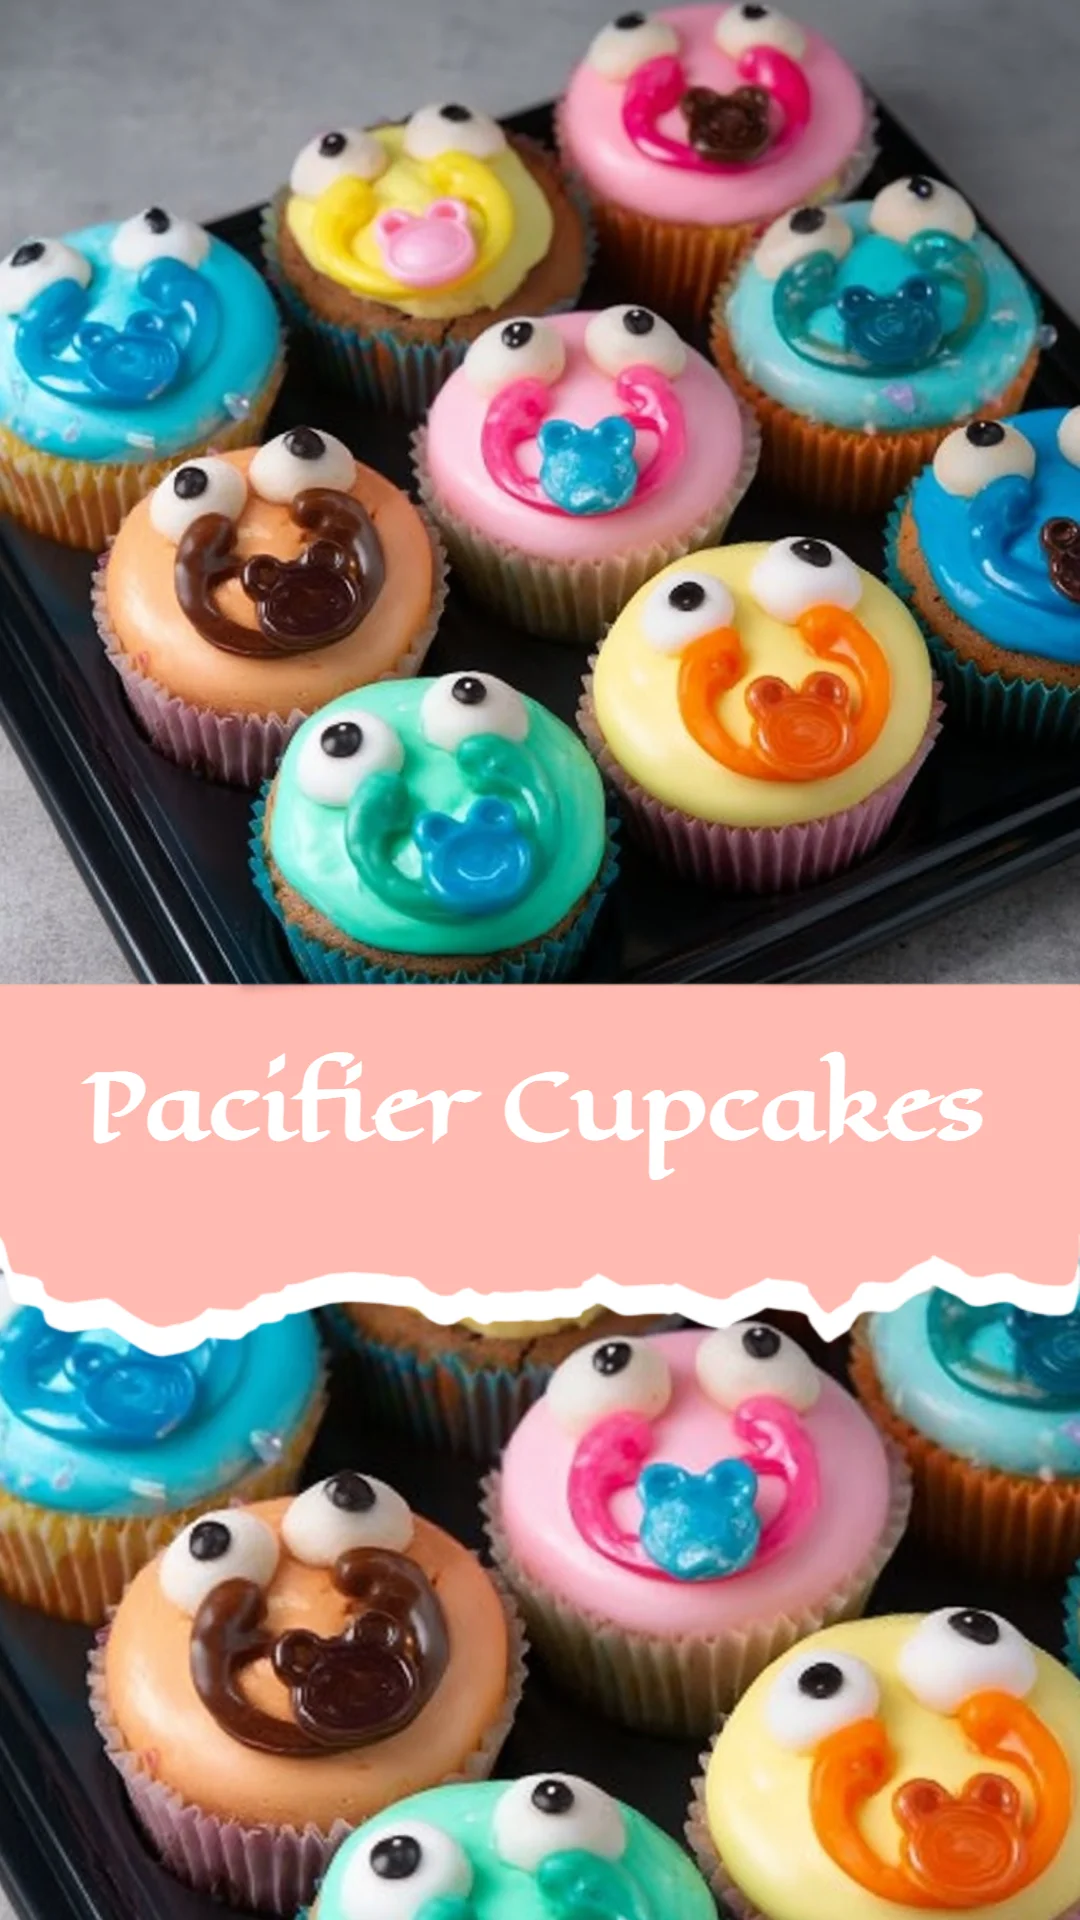
Pacifier Cupcakes
A last-minute guest RSVP, a to-do list that never stops, and the pressure to have food that looks as good as it tastes — I’ve been there. If you’re worried about limited time, feeding a crowd, or how dessert will look on the table, relax: Pacifier Cupcakes are a tiny, adorable solution that’s fast, fuss-free, and shower-ready. This recipe gives you pretty results without complicated steps, so you can focus on hosting and enjoying the day.
A Quick Look at This Pacifier Cupcakes Recipe
Pacifier Cupcakes start with a simple boxed cake mix and ready-made frosting, two ingredients that guests almost always love. The decoration is quick — chocolate chips or candy eyes plus small pacifier props — so you get an impressive baby-shower look in minutes. These cupcakes are make-ahead friendly and easy to transport, with minimal mess and no tricky piping required. Perfect for casual showers or dessert tables, they’re guaranteed to be a conversation starter and will disappear fast.
Ingredients You’ll Need for Pacifier Cupcakes
Essentials
- 1 boxed vanilla or chocolate cake mix (plus ingredients called for on the box: typically eggs, oil, and water)
- 1 tub or can of vanilla or chocolate frosting (store-bought saves time)
- Semi-sweet chocolate chips (for the upside-down “eyes”)
- Edible candy eyes (optional alternative to chocolate chips)
- Small pacifier decorations (plastic or edible pacifier candies — make sure they are clean and food-safe)
Optional Add-ons
- Sprinkles or sanding sugar in pink, blue, neutral pastels, or gold for a finished look
- Mini cupcake liners in themed colors or patterns to match the shower
- Edible glitter or pearl dust for a delicate shimmer
- Flavored frosting or extracts (almond, lemon, or a tiny bit of coffee for chocolate cupcakes) to match your theme
- Coordinated serving doilies or cupcake stands to elevate presentation
- Small toppers (paper flags, baby blocks, or tiny banners) if pacifiers are for display and you want variety
Substitutions and Shortcuts
- Boxed cake mix swap: use a 9×13 cake mix if you prefer to cut into small squares instead of cupcakes
- Frosting shortcut: buy pre-flavored tubs to match the cake (chocolate-on-chocolate is foolproof)
- Chocolate chip alternatives: use mini M&M’s, small chocolate drops, or even a dab of dark frosting piped into two dots
- Pacifier props: if you can’t source pacifier candies, use baby-safe shower ring candies or place a paper pacifier topper on a toothpick
- Gluten-free option: use a certified gluten-free boxed cake mix and gluten-free frosting (see allergy section)
- Time-saving bake: bake cupcakes in multiple pans at once and cool on wire racks to speed the process
Ingredient alternatives for allergies or availability
- Gluten-free: pick a certified gluten-free cake mix and confirm the frosting is gluten-free. Watch for hidden gluten in certain sprinkles or candy eyes — check labels carefully.
- Dairy-free: use a dairy-free frosting (many plant-based tub frostings exist) and dairy-free chocolate chips made from cocoa butter and non-dairy milk alternatives.
- Egg-free: look for egg-replacer boxed mixes or follow an eggless cupcake recipe if guests have egg allergies.
- Nut-free: choose ingredients labeled as nut-free and avoid store brands that handle nuts. Many boxed mixes are processed in facilities that may contain traces of nuts — check the packaging.
- Vegan: pair a vegan cake mix with plant-based frosting and vegan chocolate chips; use vegan-friendly pacifier candies or paper toppers.
- Candy-eye substitutes: if candy eyes contain allergens or aren’t available, use two small dots of piped frosting or upside-down mini-chocolate chips.
- Avoiding hidden gluten: powdered sugar in some frostings is usually safe, but always check stabilization ingredients and read the “contains” statements on all packaged items.
How to Make Pacifier Cupcakes Step-by-Step
I keep the process short, calm, and reliable — here’s how I do it when I’m feeding a crowd.
Bake the cupcakes
- Follow the cake mix directions for batter and bake time. Use standard-size cupcake tins for taller cupcakes or mini tins for bite-sized options.
- Tip: Fill liners about two-thirds full for even domes.
Cool completely
- Allow cupcakes to cool on a wire rack for at least 30 minutes. You can speed this by removing from pans once they’re firm and letting air circulate.
- Make-ahead: Bake the day before, cool fully, then store in an airtight container at room temperature.
Flatten the tops
- Before frosting, use a sharp paring knife to trim the domes so each cupcake is almost flat. I do this quickly with a gentle horizontal cut; perfection isn’t necessary. The goal is a stable surface for frosting and decorations.
Frost simply
- Spread frosting with an offset spatula or the back of a spoon in a smooth coat. Keep it thin and even — you don’t need fancy piping to look polished.
- Make-ahead: Pipe or spread frosting lightly the morning of the shower to prevent smearing during transport.
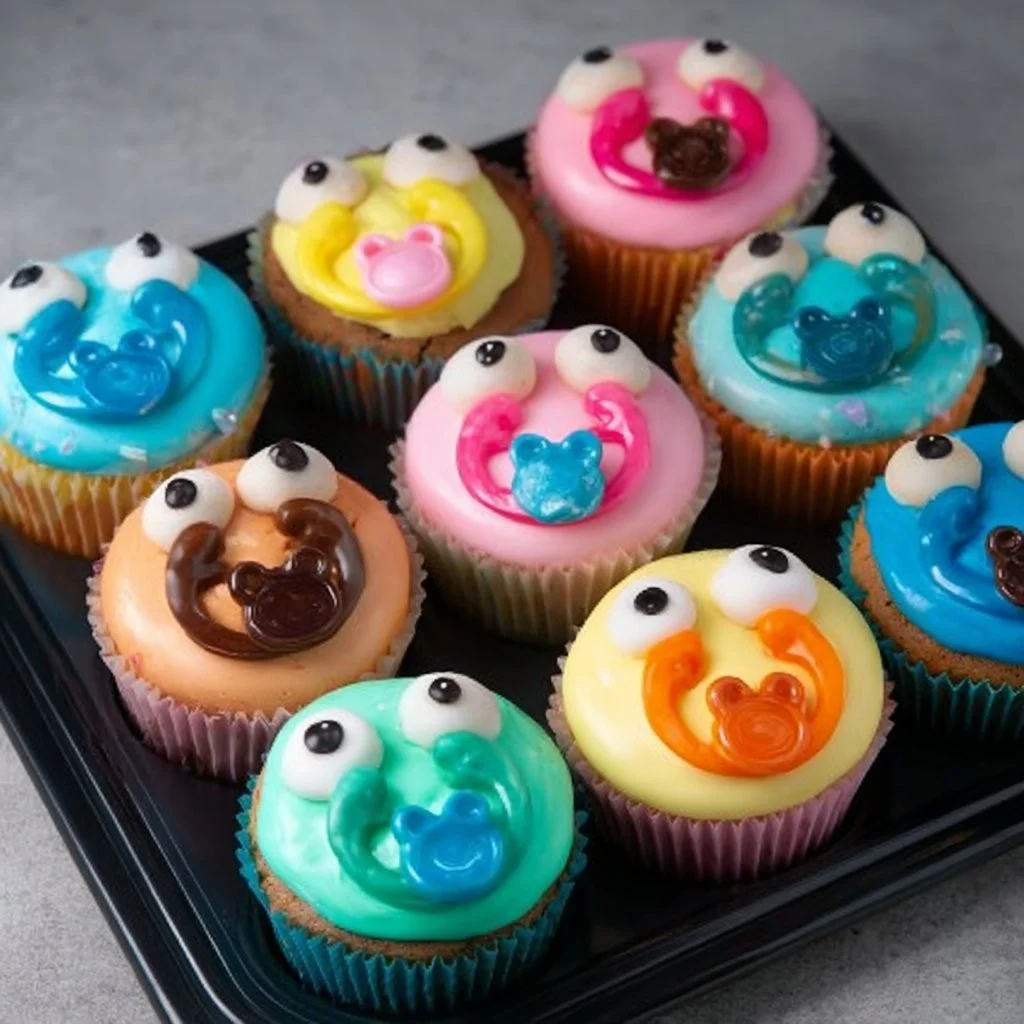
Add “eyes” and pacifiers
- Place two upside-down semi-sweet chocolate chips for eyes (flat side down, point up). Or use candy eyes if you prefer a brighter look.
- Gently press a clean pacifier decoration onto the cupcake so it looks like a pacifier in a baby’s mouth. If you’re using plastic pacifiers, position them carefully and remove before guests eat if they’re not edible.
Final touches and storage
- Add sprinkles or a light dusting of edible glitter if you like. Store finished cupcakes in a single layer in an airtight container and keep them cool but not refrigerated unless frosting contains perishable ingredients.
- Transport tip: Use cupcake carrier trays or box with dividers. If you layer, place parchment between layers to avoid sticking.
Keep steps short, pace yourself, and know that a slightly imperfect cut or a wonky eye still reads adorable. Guests will love them.
Common Mistakes to Avoid
When I’m planning for a baby shower, the best way to stay calm is to plan for easy wins and avoid small problems that multiply into stress. A little prep stops last-minute scrambles and keeps your serving simple.
Mistake 1: Over-decorating and wasting time
Too many decoration steps add stress and rarely get noticed by guests. Stick to one simple accent — pacifiers plus two chocolate-chip eyes — and your cupcakes will look intentional and tidy without hours of work.
Mistake 2: Making serving complicated
Don’t force elaborate serving pieces or fussy displays that require re-assembly at the venue. Use tiered stands or simple trays that are ready to place on the table. Pack a small tool kit (spatula, tongs, napkins) and you’ll avoid on-site panic.
Mistake 3: Creating unnecessary cleanup
Avoid sticky or overwhelming frostings that drip and require extra napkins. Use a firm, spreadable frosting and serve cupcakes in liners or on plates that are easy to pick up. If using plastic pacifier props, have a trash receptacle nearby or supply small bags for guests to discard them.
Serving Suggestions for Pacifier Cupcakes
I like to keep serving simple so I can enjoy the shower as much as everyone else. These approaches minimize mess and keep refills quick.
Individual portions: easy finger-food service
Serve cupcakes on small dessert plates or in cupcake liners so guests can grab-and-go. Place napkins and small forks nearby for those who prefer utensils. Label flavors simply to avoid confusion.
Buffet or dessert table setup
Arrange cupcakes on tiered stands centered on your dessert table, with a few extras in front to make refilling quick. Keep frosting-tasting signs off to reduce people handling multiple items; have one person manage the table if it’s large.
Minimal mess, quick refills
Store extras in boxes or carriers nearby. Use disposable trays for fast replacement and keep cleaning wipes accessible for spills. If you expect sticky hands, include a small station with napkins and hand sanitizer.
Conclusion
I want you to feel calm knowing Pacifier Cupcakes are an easy, crowd-pleasing dessert that saves time while looking charming. They’re practical to prep in advance, simple to transport, and sweet without being fussy — perfect for any baby shower. If you want ideas for edible pacifier alternatives or themed toppers, I found a resource that explores baby-themed cupcake options and edible pacifier choices that can help you match a look or dietary need: baby face baby pacifier cupcakes Edible Pacifiers For Baby Shower. Use this recipe as your go-to when you want a quick win and a pretty dessert table.
FAQs About Pacifier Cupcakes
Yes. I often bake the cupcakes a day ahead and store them in an airtight container at room temperature. Frosting and decorate the morning of the shower if you’re worried about transport; otherwise, you can frost the night before if the frosting is stable. Just keep them in a cool place.
I recommend planning 1 cupcake per guest as a baseline. If you expect sweet lovers or smaller appetizers, plan 1.5 cupcakes per guest to be safe. For a wide age range or children, consider both mini and regular sizes so everyone can pick what they prefer.
For big crowds, set up multiple small stations with cupcakes to avoid long lines. Use tiered stands and keep extras nearby in carriers for quick refills. Assign one person to monitor the table if possible so it stays tidy and well-stocked.
Store leftovers in a single layer in an airtight container at room temperature for up to 2 days if your frosting is non-perishable. If the frosting contains dairy or perishable fillings, refrigerate and bring to room temperature before serving. For longer storage, freeze unfrosted cupcakes wrapped tightly, then thaw and frost as needed.
Absolutely. I freeze fully cooled, unfrosted cupcakes wrapped individually, then thaw and frost the day of the event. Add pacifier decorations and eyes after frosting so they stay crisp and look fresh. Freezing cuts down on day-of work and keeps presentation neat.
Pacifier Cupcakes
Ingredients
Essentials
- 1 box boxed vanilla or chocolate cake mix Plus ingredients called for on the box (typically eggs, oil, and water)
- 1 tub vanilla or chocolate frosting Store-bought saves time
- 1/2 cup semi-sweet chocolate chips For upside-down ‘eyes’
- 12 pieces small pacifier decorations Plastic or edible pacifier candies — ensure they are clean and food-safe
Optional Add-ons
- 1 cup sprinkles or sanding sugar In pink, blue, neutral pastels, or gold for a finished look
- 1 pack mini cupcake liners In themed colors or patterns to match the shower
- to taste edible glitter or pearl dust For a delicate shimmer
- 1 tsp flavored frosting or extracts Almond, lemon, or a tiny bit of coffee for chocolate cupcakes
Instructions
Bake the cupcakes
- Follow the cake mix directions for batter and bake time. Use standard-size cupcake tins for taller cupcakes or mini tins for bite-sized options.
- Tip: Fill liners about two-thirds full for even domes.
Cool completely
- Allow cupcakes to cool on a wire rack for at least 30 minutes.
- Make-ahead: Bake the day before, cool fully, then store in an airtight container at room temperature.
Flatten the tops
- Before frosting, use a sharp paring knife to trim the domes so each cupcake is almost flat.
- The goal is a stable surface for frosting and decorations.
Frost simply
- Spread frosting with an offset spatula or the back of a spoon in a smooth coat. Keep it thin and even.
- Make-ahead: Pipe or spread frosting lightly the morning of the shower to prevent smearing during transport.
Add ‘eyes’ and pacifiers
- Place two upside-down semi-sweet chocolate chips for eyes (flat side down, point up) or use candy eyes for a brighter look.
- Gently press a clean pacifier decoration onto the cupcake so it looks like a pacifier in a baby’s mouth.
Final touches and storage
- Add sprinkles or a light dusting of edible glitter if you like.
- Store finished cupcakes in a single layer in an airtight container and keep them cool.
- Transport tip: Use cupcake carrier trays or box with dividers.