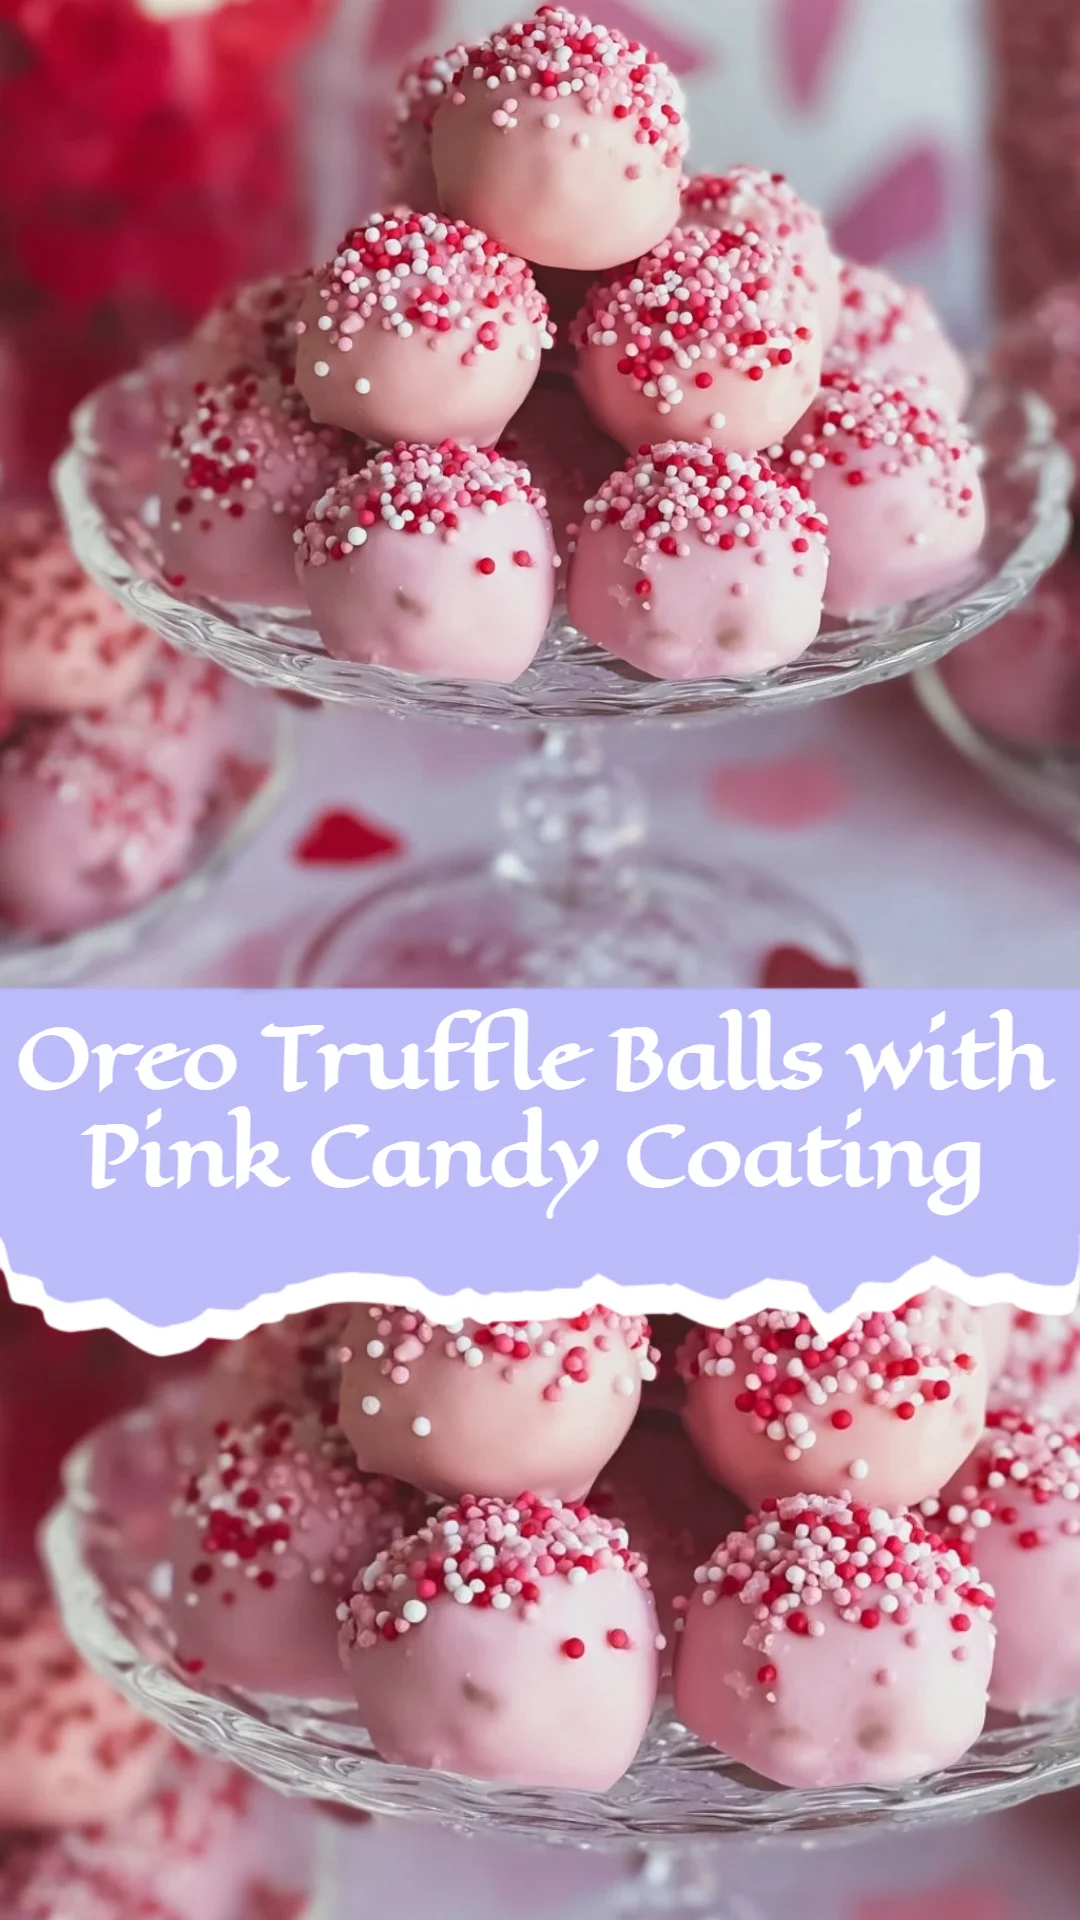
Oreo Truffle Balls with Pink Candy Coating
A last-minute guest RSVP, a stack of tiny paper plates, and a feeling that you might be short on time—that’s the kind of baby-shower planning moment I know well. When you’re juggling centerpieces and a menu for a crowd, you want food that’s fast, pretty, and stress-free. These Oreo Truffle Balls with Pink Candy Coating are exactly that: simple to make, easy to dress up, and perfect for a sweet table that looks polished without hours in the kitchen.
A Quick Look at This Oreo Truffle Balls with Pink Candy Coating Recipe
This recipe uses two crowd-pleasers—Oreos and cream cheese—so most guests will already be excited before tasting. It’s make-ahead friendly: you can form the truffles in advance and dip them the day of the shower. The candy coating gives a clean, colorful finish that’s great for themed showers and makes serving mess-free finger food. Expect quick prep, minimal equipment, and a treat that looks shop-bought without the fuss.
Ingredients You’ll Need for Oreo Truffle Balls with Pink Candy Coating
Essentials
- 1 package (14.3 oz) Oreo cookies (about 36 cookies) — regular Oreos work best for the classic flavor and texture.
- 8 oz cream cheese, softened to room temperature — this binds the crumbs into a creamy, scoopable dough.
- 1/4 cup powdered sugar (optional) — adds a touch more sweetness if you prefer a sweeter truffle.
- 2 cups pink candy melts (or any color of choice) — these melt smoothly and give a shiny, kid-friendly finish.
- 1 tablespoon coconut oil or vegetable oil — thins the candy melts slightly for easier dipping.
- 1/4 cup pink, red, and white sprinkles (optional) — for quick, festive decoration that reads “baby shower” at a glance.
Optional Add-ons
- Mini edible pearls or silver dragées — use them sparingly for a polished look.
- Small paper cupcake liners or mini baking cups — make serving and cleanup easier and add to presentation.
- Piped white chocolate drizzle — melt white chocolate and use a spoon or piping bag for delicate stripes.
- Themed toppers (baby bottles, tiny bows, or onesies) — small picks can help tie the truffles into your shower theme.
- Flavor extracts (1/4 to 1/2 teaspoon vanilla or almond) — stir into the cream cheese for a subtle twist.
- Colored cellophane bags and twine — great for gifting truffles as party favors.
Substitutions and Shortcuts
- Pre-crumbed cookies: Buy crushed Oreo crumbs if your store stocks them, or ask the bakery to crush cookies for you.
- No food processor? Use a sturdy zip-top bag and a rolling pin—crush the cookies until they’re fine.
- Store-bought chocolate bark: Instead of candy melts, you can use pre-made colored bark sheets and cut them into pieces to melt or dip.
- Cream cheese alternative: For a slightly lower-fat option, try Neufchâtel cheese (same texture, milder taste).
- Pre-portioned scoops: Use a 1-inch cookie scoop to quickly size balls evenly—less rolling, more speed.
- Microwave steam-tray warming: Keep candy melts gently warm on a low-heat setting to maintain dipping consistency during service.
Ingredient alternatives for allergies or availability
I always plan for guests who may have allergies or dietary preferences. Here are simple swaps that keep the recipe baby-shower friendly while avoiding hidden problems.
- Dairy-free: Use dairy-free cream cheese (many brands mimic regular cream cheese well) and dairy-free candy melts. Note: dairy-free candy melts can be firmer; add a touch more coconut oil to reach a smooth dipping consistency.
- Gluten-free: Use certified gluten-free sandwich cookies that mimic Oreos. Always check the package for cross-contamination warnings. Even if a cookie brand says “chocolate sandwich,” confirm it’s certified gluten-free to avoid risks.
- Nut allergies: Most original ingredients are nut-free, but check the candy melt label for “may contain traces of nuts.” Pick nut-free certified brands to be safe.
- Soy-free: Many candy melts contain soy lecithin. Look for soy-free chocolate wafers or use melted white chocolate chips labeled soy-free.
- Hidden gluten sources: Be careful with sprinkles and candy melts—some decorations and melts can be produced in facilities that process wheat. Stick to products labeled gluten-free and check ingredient lists for “wheat,” “barley,” or “malt.”
- Sweetness control: Omit the powdered sugar if you want a less sweet filling. Taste the mixed dough before forming it (small pinch) to check sweetness.
When in doubt, label the dessert table with common allergens and keep a few truffles wrapped separately to avoid cross-contact if you know specific guests have sensitivities.
How to Make Oreo Truffle Balls with Pink Candy Coating Step-by-Step
I keep these steps short and focused so you can get party-ready without second-guessing. You don’t need bakery skills—just a few focused minutes and basic tools.
-
Make the Oreo crumb mixture
- Put the Oreo cookies in a food processor and pulse until they’re fine crumbs. No food processor? Seal cookies in a zip-top bag and crush with a rolling pin until very fine.
- Transfer crumbs to a large bowl. Add the softened cream cheese and optional powdered sugar. Mix with a spatula until you have a thick, uniform dough—no large cookie pieces. This should be sticky and hold together when pressed.
-
Shape and chill
- Scoop and roll 1-inch balls (I use a small cookie scoop for speed). Place them on a baking sheet lined with parchment or wax paper.
- Freeze the balls for 20–30 minutes, or refrigerate for at least 1 hour. Chill until firm so they don’t fall apart when dipped.
-
Prepare the candy coating
- In a microwave-safe bowl, combine the candy melts with the coconut or vegetable oil. Microwave in 30-second bursts, stirring between bursts, until smooth and pourable. Let the melted candy cool just slightly so it’s not scorching hot—warm enough to dip easily.
-
Dip and decorate
- Use a fork or dipping tool to lower each chilled ball into the melted candy, tapping off excess gently. Place the coated truffle back on the lined sheet.
- Sprinkle with your choice of sprinkles while the coating is still wet so decorations stick.
-
Final chill and store
- Chill dipped truffles in the fridge for 10–15 minutes until the coating sets.
- Store the finished Oreo Truffle Balls with Pink Candy Coating in an airtight container in the fridge for up to 7 days, or freeze for longer storage (see FAQs for thawing tips).
Quick tips:
- Work in batches: Dip 10–12 truffles at a time to keep the candy coating consistent.
- Keep a warm bowl of melted candy on a mug warmer or very low heat if you’re dipping a lot—this avoids repeated microwaving.
- Perfection is unnecessary: If a few truffles look slightly different, that’s charming and homey—guests won’t mind.
Common Mistakes to Avoid
Preparing food for a baby shower should reduce stress, not add to it. A few small mistakes can waste time or make serving harder—here’s how to avoid them so you can relax and enjoy the event.
Mistake 1: Skipping the chill time
Not chilling the truffles enough leads to messy dips and collapsed shapes. I always freeze or refrigerate the rolled balls until firm; it saves time overall because dipping goes smoothly.
Mistake 2: Overheating the candy melts
Microwaving candy melts too long can scorch them, making them grainy or lumpy. Use short bursts, stir between intervals, and add a teaspoon of oil to rescue slightly thick melts instead of overheating.
Mistake 3: Trying to do all dipping at the last minute
Dipping everything right before guests arrive creates stress and a big mess. I prep the truffle centers ahead of time and dip them a few hours before the shower. If needed, they can be dipped the day before and stored in the fridge.
Serving Suggestions for Oreo Truffle Balls with Pink Candy Coating
These truffles are designed to be easy to serve and visually sweet on any dessert table. I suggest setups that keep the table tidy and the refills quick.
Start with one tray, then add variety: present the truffles in a few different ways to fit your shower theme without overcomplicating things.
Bite-size buffet display
Arrange truffles in mini paper cups and place them on tiered stands. This creates height on the dessert table and makes it easy for guests to take 1–2 pieces without touching others.
Finger-food station
Place truffles on small trays with a sign listing flavors and allergens. Keep a pair of small tongs nearby and replenish trays from a chilled container in the back to avoid overcrowding.
Favor-style packaging
Wrap a few truffles in clear cellophane bags and tie with pastel ribbon for quick favors. This also works well for guests who’d like to take treats home—label the bags if any have allergens.
Conclusion
Hosting a baby shower can feel manageable if you choose simple, reliable recipes like these Oreo Truffle Balls with Pink Candy Coating. I love this recipe because it reduces last-minute stress, looks adorable on a dessert table, and keeps well so you can prep ahead. If you want a quick reference for a classic Oreo truffle base while planning variations, I sometimes look at Oreo Truffles – Love Bakes Good Cakes for inspiration and tips on shaping and decorating.
I hope you feel calm and confident making these for your next shower—easy steps, beautiful results, and plenty of smiles from a happy crowd.
FAQs About Oreo Truffle Balls with Pink Candy Coating
Q1: Can I make Oreo Truffle Balls with Pink Candy Coating ahead of time?
A1: Yes. You can prepare the Oreo truffle centers and keep them refrigerated for up to 3 days or frozen for up to 3 months. Dip them in candy coating on the day of the shower for the freshest look, or dip them a day ahead and store in the fridge.
Q2: How many people will one batch of Oreo Truffle Balls with Pink Candy Coating serve?
A2: A standard batch (about 36 Oreos) yields roughly 30–36 one-inch truffles, depending on size. Plan 2–3 truffles per guest for a dessert table offering, so one batch serves about 12–18 guests as part of a larger spread.
Q3: What’s the best way to store leftover Oreo Truffle Balls with Pink Candy Coating?
A3: Place leftovers in a single layer in an airtight container with parchment between layers and refrigerate for up to 7 days. For longer storage, freeze them in a sealed container for up to 3 months; thaw in the fridge before serving.
Q4: Can I serve Oreo Truffle Balls with Pink Candy Coating at a large group event?
A4: Absolutely. They’re easy to scale—double or triple the recipe and dip in batches. Keep dipped truffles chilled in the fridge and replenish serving trays from a chilled container to keep things tidy.
Q5: How do I thaw frozen Oreo Truffle Balls with Pink Candy Coating without condensation making them sticky?
A5: Thaw frozen truffles in the refrigerator in their airtight container for several hours or overnight. Bring them to room temperature right before serving to reduce condensation on the candy coating. If condensation appears, blot gently with a paper towel.

Oreo Truffle Balls with Pink Candy Coating
Ingredients
Essentials
- 1 package (14.3 oz) Oreo cookies About 36 cookies, regular Oreos work best for classic flavor.
- 8 oz cream cheese Softened to room temperature.
- 1/4 cup powdered sugar Optional, adds more sweetness.
- 2 cups pink candy melts Or any color of choice.
- 1 tablespoon coconut oil or vegetable oil For thinning the candy melts.
- 1/4 cup pink, red, and white sprinkles Optional decoration.
Optional Add-ons
- as needed mini edible pearls or silver dragées Use sparingly for a polished look.
- as needed small paper cupcake liners For easier serving and cleanup.
- as needed piped white chocolate drizzle For decorative stripes.
- as needed themed toppers Baby bottles, tiny bows, or onesies for decor.
- 1/4 to 1/2 teaspoon flavor extracts Vanilla or almond for added flavor.
Instructions
Make the Oreo crumb mixture
- Put the Oreo cookies in a food processor and pulse until they’re fine crumbs. If you don't have a food processor, seal cookies in a zip-top bag and crush with a rolling pin until very fine.
- Transfer crumbs to a large bowl. Add the softened cream cheese and optional powdered sugar. Mix with a spatula until you have a thick, uniform dough—no large cookie pieces.
Shape and chill
- Scoop and roll 1-inch balls. Place them on a baking sheet lined with parchment or wax paper.
- Freeze the balls for 20–30 minutes or refrigerate for at least 1 hour until firm.
Prepare the candy coating
- In a microwave-safe bowl, combine the candy melts with the coconut or vegetable oil. Microwave in 30-second bursts, stirring in between, until smooth and pourable. Let cool slightly.
Dip and decorate
- Use a fork or dipping tool to lower each chilled ball into the melted candy, tapping off excess gently.
- Sprinkle with your choice of sprinkles while the coating is still wet.
Final chill and store
- Chill dipped truffles in the fridge for 10–15 minutes until the coating sets.
- Store in an airtight container in the fridge for up to 7 days or freeze for longer storage.