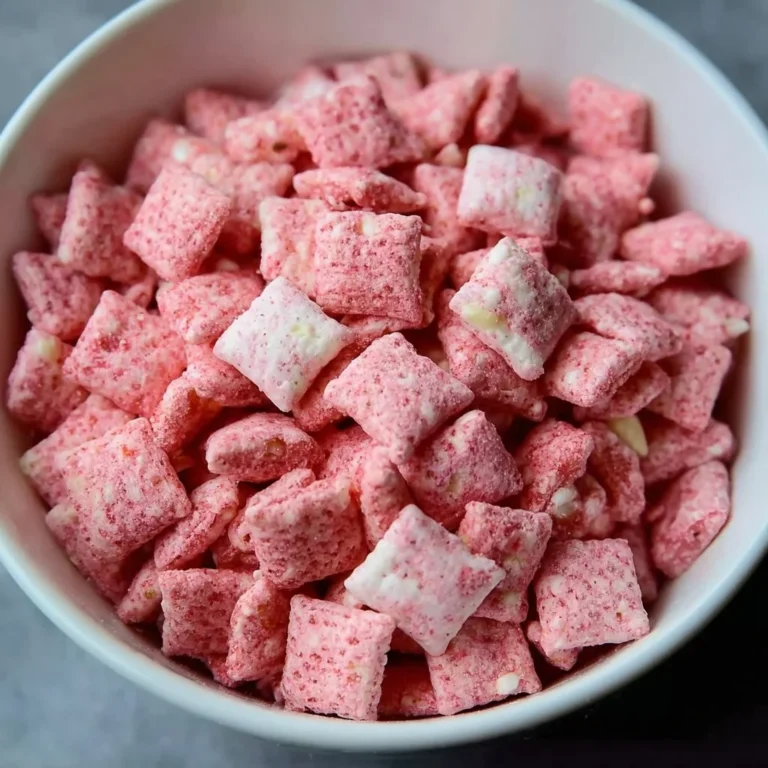
Pink Popcorn
A last-minute guest list change? Feeling the hosting nerves and wondering how to feed a hungry crowd without spending all day in the kitchen? I’ve been there. This Pink Popcorn is a fast, fuss-free snack that looks party-ready, feeds many, and gives you back time to focus on the mom-to-be. It’s simple, reliable, and easy to make ahead so you can relax and enjoy the celebration.
A Quick Look at This Pink Popcorn Recipe
This Pink Popcorn pairs two crowd-pleasers: light, crunchy popcorn and a sweet, flavored pink coating guests love. It’s make-ahead friendly — you can prepare it a day in advance — and it’s easy to portion into small cups or bowls for quick serving. Because it’s visually festive and low-mess, it’s perfect for baby showers or casual celebrations where you want a themed snack without extra stress. Give it a try and you’ll see why guests keep coming back for more.
Ingredients You’ll Need for Pink Popcorn
Essentials
- 1/2 cup popcorn kernels — the base of the snack; inexpensive and makes a lot of popcorn.
- 1/4 cup granulated sugar — provides sweetness and helps the pink coating set.
- 3 tablespoons unsalted butter — adds richness and helps the sugar dissolve smoothly.
- 2 tablespoons light corn syrup — keeps the coating glossy and prevents crystallization.
- 1/2 teaspoon raspberry extract — delivers a mild, fruity flavor that pairs with the pink color.
- Pink food coloring (gel or liquid) — gives the popcorn its celebratory hue; use gel for stronger color with less product.
- Edible glitter or sprinkles (optional) — for added sparkle and party presentation.
Optional Add-ons
- White chocolate drizzle — melt a little white chocolate and drizzle for a richer treat.
- Chopped freeze-dried raspberries — adds texture and enhances raspberry flavor.
- Mini marshmallows or heart-shaped sprinkles — easy, themed decorations for a baby girl shower.
- Themed serving cups or paper cones — quick presentation upgrades that make refills simple.
- Colored sugar crystals — a little sparkle on top makes the popcorn look more festive.
Substitutions and Shortcuts
- Popcorn shortcut: Use 10–12 cups of pre-popped plain popcorn from a plain bagged variety if you’re short on time.
- Butter swap: Use margarine or a vegan butter for dairy-free needs (taste and color may vary).
- Corn syrup alternative: Use 2 tablespoons of light honey as a swap; flavor will be different and coating may set slightly softer.
- Sugar swap: Use superfine sugar (caster sugar) to help the coating dissolve faster.
- Extracts: If you don’t have raspberry extract, use vanilla + a few drops of berry-flavored syrup, but reduce overall sweetness if the syrup is sugary.
- Food coloring: If you prefer natural color, use a small amount of beet juice concentrate — test a little first, as it can add slight flavor.
Ingredient alternatives for allergies or availability
I keep this section short and practical so you can adapt for common allergies or pantry gaps.
- Dairy-free: Use vegan butter or coconut oil (solid at room temp) instead of unsalted butter. Note: coconut oil adds a faint coconut scent.
- Corn-free: If you need to avoid corn syrup, try light agave syrup or a neutral-flavored rice syrup. The texture of the coating may be slightly different.
- Nut-free: This recipe is naturally nut-free, but always check labels on extracts, sprinkles, and edible glitter to ensure they’re processed in a nut-free facility if needed.
- Gluten: Plain popcorn and the listed ingredients are generally gluten-free. However, avoid pre-flavored microwave popcorn or sprinkles that list wheat or barley ingredients. Check labels for “gluten-free” if allergies are a concern.
- Vegan: Replace butter with vegan butter and use a vegan-friendly sugar (some sugars are processed with bone char — look for “organic” or “vegan” labeled sugar). Use vegan sprinkles and non-dairy chocolate if adding drizzles.
Notes on avoiding hidden gluten sources:
- Read ingredient labels for extracts, sprinkles, and edible glitter — some decorative products can contain wheat-based ingredients or be processed in facilities that handle gluten. When in doubt, choose items labeled gluten-free.
How to Make Pink Popcorn Step-by-Step
I like to keep the steps short and calm. You don’t need perfection — just follow these quick moves and you’ll have an attractive snack in under 30 minutes.
- Pop the popcorn
- Heat a large pot with a tight-fitting lid over medium heat.
- Add the 1/2 cup popcorn kernels, cover, and shake the pot occasionally.
- When popping slows to a few seconds between pops, remove from heat and let sit one minute. Transfer popped corn to a large bowl and discard any unpopped kernels.
- Make the pink coating (the “pink potion”)
- In a small saucepan over low heat, melt 3 tablespoons unsalted butter.
- Stir in 1/4 cup granulated sugar and 2 tablespoons light corn syrup until smooth and the sugar dissolves.
- Keep the heat low — you’re aiming for a glossy mixture, not a boil.
- Add flavor and color
- Remove the pan from heat and stir in 1/2 teaspoon raspberry extract.
- Add a few drops of pink food coloring, mixing until you reach the shade you like. Gel coloring works well if you want a bright pink with less liquid.
- Coat the popcorn
- Drizzle the pink mixture evenly over the popped corn in your large bowl.
- Use a spatula to gently toss and coat. Don’t worry about perfect coverage — a light, even layer gives great flavor and keeps crunch.
- Add sparkle and set
- If you’re using edible glitter or sprinkles, sprinkle them on right after coating so they stick.
- Spread the popcorn on parchment-lined baking sheets to cool and set for 10–15 minutes. Cooling helps the coating firm a bit.
- Make-ahead and storing
- Once cooled, transfer to airtight containers. Store at room temperature up to 24–48 hours for best crispness.
- If you want to make a day ahead, store in a sealed container and add fresh sprinkles just before serving to keep them crisp.
Tips I use every time:
- Work quickly when drizzling the coating so you can toss before it firms.
- If you want a thicker coating, warm the mixture slightly longer (low heat) to dissolve more sugar, but don’t overheat.
- Perfection isn’t the goal — pretty, tasty, and easy are what matter at a baby shower.
Common Mistakes to Avoid
Cooking for a baby shower should reduce stress, not add to it. I focus on practical steps that save time and keep serving simple.
Mistake 1: Overcomplicating the serving setup
Don’t create multiple stations or complicated displays that need constant attention. Keep the popcorn in simple cups, cones, or a big bowl with a scoop for easy self-service.
Mistake 2: Trying to make everything from scratch at the last minute
Avoid last-minute baking marathons. Make the popcorn a day ahead or use pre-popped plain popcorn to speed things up. That saves time and lowers stress.
Mistake 3: Using fragile decorations that make cleanup harder
Skip tiny, hard-to-clean decorations that fall into food or require separate disposal. Choose edible glitter or sprinkles that won’t create a mess, and use disposable serving cups for easy clean-up.
Serving Suggestions for Pink Popcorn
Keep serving simple so you’re not tied to a station during the party. I recommend options that look polished without adding work.
Start with a short note:
I plan serving so guests can grab and go — that way I can enjoy the shower too. These setups are fast, pretty, and low-mess.
Individual servings in paper cups or cones
Portion the Pink Popcorn into small paper cups or themed paper cones before guests arrive. It looks tidy, limits mess, and makes refills quick. Use 6–8 cup portions for light snacking, or larger cups if you expect lots of nibbling.
Popcorn buffet bowl with scoops
Set out a large bowl of Pink Popcorn with disposable scoops and small favor bags. Guests scoop what they want, and you can quickly top off bowls between activities. Keep the bowl covered or tucked under a tented card to protect from stray confetti.
Favor bags or take-home treats
Fill clear treat bags with Pink Popcorn and tie them with a ribbon or sticker matching the shower theme. These double as snacks during the event and simple favors to send home — no extra wrapping stations needed.
Conclusion
I keep this recipe as a go-to because it’s fast, pretty, and practically fuss-free — exactly what you want when hosting a baby shower. You can make it ahead, serve it in cute single portions, and trust that guests will love the sweet, crunchy treat. For a similar inspiration and step-by-step photos I sometimes reference, check out this Pink Popcorn {Colored Popcorn} Recipe | by Leigh Anne Wilkes — it’s a helpful resource if you want a visual guide.
FAQs About Pink Popcorn
Yes. I recommend making it up to 24–48 hours before the event. Store the cooled popcorn in airtight containers at room temperature. For the best crunch, avoid storing in humid places and add any delicate sprinkles or glitter right before serving.
For casual snacking at a baby shower, plan about 6–8 cups per 8–10 guests if it’s one of several snacks. If Pink Popcorn is a main treat, plan 1 to 1.5 cups per guest. I usually estimate conservatively and prepare an extra large bowl — leftover popcorn stores well.
I like pre-portioned paper cups or cones for easy grab-and-go service. Alternatively, a large bowl with small disposable scoops works well for self-service. Both options keep the serving area neat and cut down on refilling time.
Stored in an airtight container at room temperature, Pink Popcorn stays best for 24–48 hours. If it gets slightly soft, spread it on a baking sheet and warm it in a low oven (250°F / 120°C) for 3–5 minutes to crisp it back up — watch carefully so the coating doesn’t melt or brown.
Leftovers are great for party favors — pack in small bags and tie with a ribbon. You can also save popcorn in sealed containers for snacking over the next day or two. If the coating softens, crisp it briefly in a low oven as noted above.